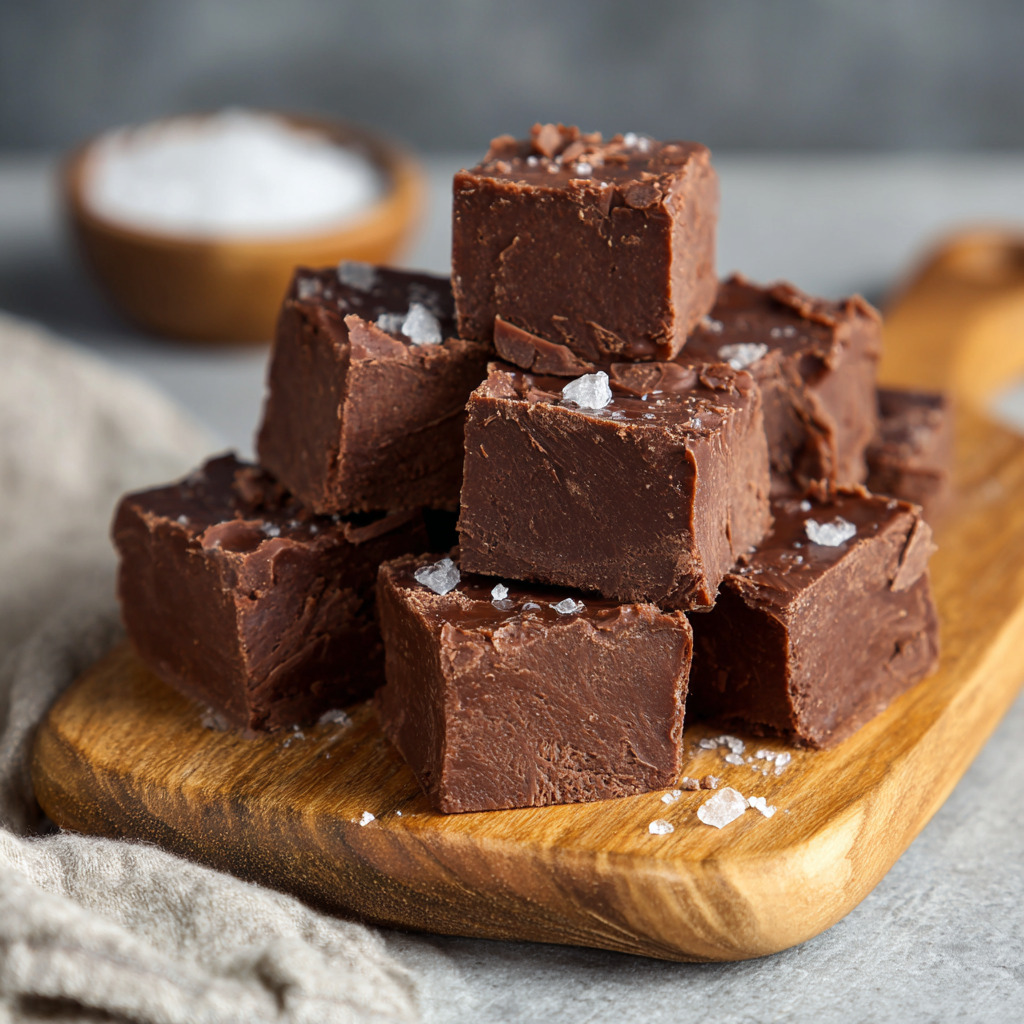
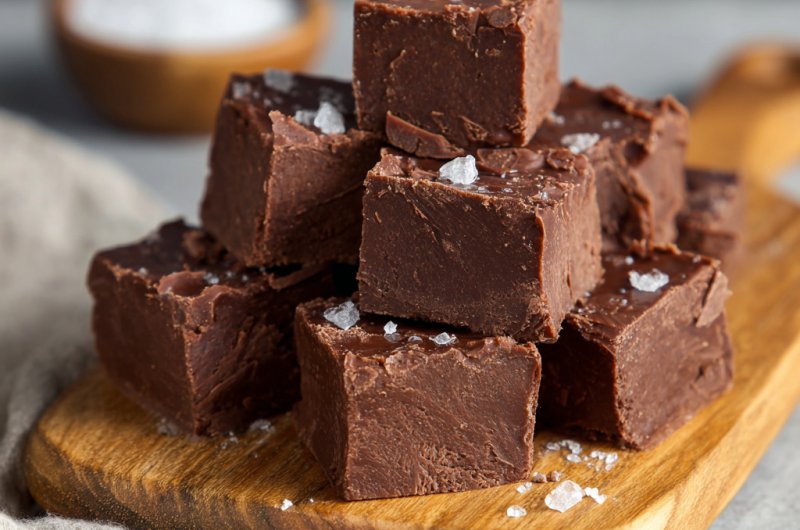
Old Fashioned Chocolate Fudge
The kitchen smelled of cocoa and sugar as the fudge mixture bubbled gently on the hob. I remember the first time I made old fashioned chocolate fudge with my daughter—it was a rainy Tuesday afternoon, and we needed something warm, sweet, and a little special. She measured the sugar with careful hands, and we both giggled when the butter melted into shiny pools.
That batch turned out creamy and rich, with just the right snap when we sliced it into little squares. It reminded me of my grandmother’s pantry—lined with tins of homemade sweets and jars filled with ribbons of fudge wrapped in wax paper. That quiet, old-world charm came rushing back, and I knew we’d found a new family tradition.
Now, it’s something we make for birthdays, holidays, or simply when the house feels a little too quiet. The slow stirring, the waiting, the excitement when it sets—each moment feels like a small celebration. I hope this old fashioned chocolate fudge brings the same joy to your kitchen as it does to ours.
Short Description
Classic old fashioned chocolate fudge—smooth, rich, and made with simple ingredients. A nostalgic treat perfect for gift giving, holiday trays, or a quiet evening snack.
Ingredients You’ll Need
Main Ingredients
- 2 cups granulated sugar
- ¾ cup whole milk or evaporated milk
- ¼ cup unsalted butter, diced
- ¾ cup unsweetened cocoa powder
- 1 tsp vanilla extract
Optional Add-Ins
- ½ cup chopped walnuts or pecans
- ½ cup mini marshmallows
Tools & Equipment
- Medium heavy-bottomed saucepan
- Wooden spoon or heatproof spatula
- Candy thermometer (optional but helpful)
- 8×8-inch square pan, lined with parchment
How To Make Old Fashioned Chocolate Fudge
Step 1: Prepare your pan
Line an 8×8-inch pan with parchment paper and set aside.
Step 2: Combine ingredients
In a saucepan over medium heat, combine sugar, milk, butter, and cocoa. Stir gently until sugar dissolves and mixture is smooth.
Step 3: Boil to soft-ball stage
Bring to a steady boil, stirring continuously. Cook until mixture reaches 234–240°F (soft-ball stage), about 5–7 minutes.
Step 4: Cool down
Remove from heat and let sit undisturbed until it cools to about 110°F. This helps create that perfect fudge texture.
Step 5: Beat until thickened
Stir in vanilla, then beat the mixture with a wooden spoon until it thickens and loses its gloss, about 3–5 minutes.
Step 6: Pour and set
Fold in nuts or marshmallows if using. Pour into the prepared pan and smooth the top. Let it set at room temperature for 2 hours before cutting into squares.
Serving and Pairing Suggestions
Perfect with a cup of earl grey or a glass of cold milk. Add to gift boxes or serve at afternoon tea for a sweet touch. Lovely paired with tart berries or citrus slices to contrast the richness.
Storing and Reheating Tips
Room Temperature: Store in an airtight container for up to 5 days.
Refrigerator: Lasts up to 1 week. Let come to room temperature before serving for best texture.
Freezer: Wrap squares individually and freeze up to 1 month. Thaw in fridge overnight.
To Reheat: Let sit at room temperature—no need to microwave.
Top Tips for Perfecting
Use a thermometer: It ensures you hit the exact soft-ball stage.
Be patient while cooling: Rushing this step can make fudge grainy.
Beat thoroughly: This helps the fudge set with a creamy texture.
Don’t skip the vanilla: It adds depth to the chocolate flavour.
Recipe Variations
Peanut Butter Swirl: Swirl in 2 Tbsp of smooth peanut butter before pouring into the pan.
Sea Salt Topping: Sprinkle flaky sea salt on top just before it sets.
Mint Chocolate: Add ½ tsp mint extract for a fresh twist.
Festive Fruit: Stir in chopped dried cherries or cranberries.
Estimated Nutrition Info (per serving, serves 16)
Calories: 110 kcal | Protein: 1 g | Carbs: 15 g | Fats: 6 g
Frequently Asked Questions
1. Can I use plant-based milk?
Yes, full-fat oat or almond milk works well, but texture may vary slightly.
2. What if I don’t have a thermometer?
Use the soft-ball method: drop a bit into cold water—it should form a soft ball.
3. Can I double the recipe?
Yes, use a 9×13-inch pan and increase cooking time slightly.
4. Why is my fudge crumbly?
It may have been overcooked or not beaten enough. Follow temperatures carefully.
5. Is this recipe gluten-free?
Yes, as long as all ingredients are certified gluten-free.
Conclusion
This old fashioned chocolate fudge is more than a sweet treat—it’s a bit of homemade tradition. Whether shared with family, wrapped up for a friend, or enjoyed quietly with tea, it brings a moment of stillness and delight.
I’d love to hear how it turns out for you. Share your twist or memory in the comments, or tag me if you post a photo—I always love seeing your kitchen moments.
Old Fashioned Chocolate Fudge
Course: DessertDifficulty: Easy16
servings15
minutes10
minutes110
kcal1
hour10
minutesA rich, creamy old-fashioned chocolate fudge that melts in your mouth with every bite. Made simply on the stovetop with pantry staples, it’s the perfect treat for cozy afternoons, gift-giving, or just a timeless sweet indulgence.
Ingredients
- Main
2 cups granulated sugar
¾ cup whole milk (or evaporated milk)
¼ cup unsalted butter (about ½ stick), diced
- Chocolate
¾ cup unsweetened cocoa powder
1 tsp vanilla extract
- Extras (Optional)
½ cup chopped nuts (pecans or walnuts)
½ cup mini marshmallows
Directions
- Line an 8 × 8 pan with parchment, leaving an overhang to ease removal. Set aside.
- In your saucepan, gently whisk together sugar, milk, butter, and cocoa over medium. Stir until sugar dissolves and mixture is warm, about 3 minutes.
- Bring the mix to a gentle boil, stirring constantly. If using a candy thermometer, aim for 234–240 °F (soft-ball stage). Without one, boil about 5 minutes—you’ll notice thicker bubbles and a glossy sheen.
- Remove from heat. Let it sit, stirring occasionally, until the temperature drops to about 110 °F (just warm to the touch). Stir in vanilla, and fold in nuts and marshmallows if using.
- Using your wooden spoon, beat the fudge until it comes together and loses its shiny gloss—about 3–5 minutes.
- Spread into the prepared pan evenly. Let it sit undisturbed at room temperature for 2 hours to firm up. If making ahead, you can refrigerate it, but I prefer the fudgy, room‑temp texture.